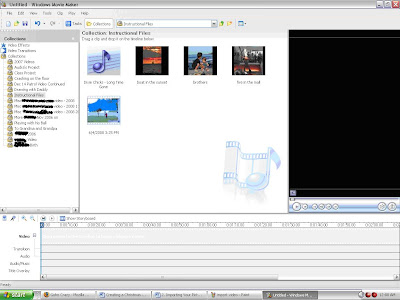
In order to begin this, you first need to be sure the correct collection file is open. If it isn’t, you’ll end up saving your files to a different collections folder. It took me a bit to learn this little trick, so I was often reimporting files when I couldn't’t find them after returning to a saved project. Very frustrating!
In order to bring your folder back up, click the Collections button you used previously. Look for your saved folder, and double click that. Then, move on to the next step.
Click the Tasks button (note, in the first picture I had NOT opened my collections folder before doing this. The next screenshot shows the correct collection listed in the drop down list. This is how yours should look as you move on to working with the Tasks panel):
Your screen should now look something like this:
Let’s start by importing a few pictures. Click “import pictures”.
A box like this will come up:
Page through your files until you find the image you are looking for. Click on it, then click the Import button. Or, you can just double click it, which is what I always end up doing!
Choose as many pictures as you are going to use. If you don't want to click on them one by one, you can CTRL click, click on non-contiguous pictures, and add several at a time. Or, you can Shift click and add a whole row or two of pictures.
As you add them to the collection, they will appear on the white field in the middle of your screen. Here is what my screen looked like after I did this:
A note about collections files: You don’t have to save them as you import. All you are doing is creating a link between your file and the program. If you move your picture somewhere else on your computer at a later date, the collection link will be broken and you will see something like this:
This is a collection file I created several years ago. I’ve since moved the video files, so the link is broken. When you make project files later on, this is also true. Your saved project will have these X boxes instead of clips in your movie if you haven’t saved it as a movie yet. However, the movie I created works fine, because once you save it as a movie, it no longer relies on these links (something we will go over later).
Setting it up this way saves you some memory space. Otherwise, you’d have two copies of everything you were using in Moviemaker. Video files are memory hogs, so this is obviously not an ideal situation.
Ok, moving on! Importing your other files follows pretty much the same steps. I’m going to go through them anyway, to give you a handy reference to follow.
Click on “import audio or music”.
Choose your music, and now you’ll see it added to your pictures. Here’s my view:
Now for the fun part; let’s bring in the video! You know the drill: Click on the “import video” link.
Pick your video and order Moviemaker to begin the import process. Unfortunately, this can take a few minutes. I don’t really understand why as it isn’t actually copying your video, but whatever. Mine always seems to take forever.
So, take a break, make some hot chocolate, tell your son to stop sitting on his brother (oh, wait, that last one was for me), and then come back to a screen that hopefully looks something like this:

Choose any more video clips you want on the final product, and follow the same steps.
Next up is Part Three: Beginning Your Movie!


0 sonar pings:
Post a Comment