Tuesday, December 23, 2008

MovieMaker Instructions, Part 5

5. Adding Transitions

All right, load up your files and let’s get going! We are going to be making transitions now. This is how you move from one section of your film to another with a smooth effect. Most professional movies use a basic fade from one scene to another. You can do the same thing with your movie. Or, if you want it to be a little more creative, you can choose from many other transitional effects.

Let’s take a look at some of them. First, we’re going to add a very simple fade in/fade out effect. Look at your timeline. Move to your first frame (or wherever you want this effect) and right click it. You should see something like this:

Look at the box you just opened. The options you are looking for are at the very bottom. Click the “Fade In” text with your mouse. Now, right click it again. You should see something like this:

Notice how there is a check mark in front of the “Fade In” option? If you click play in the black preview box, you can see how it has added a fade in effect to your opening title.

Follow the same steps to add a fade out to the same title.

Take a little time to get to know this box your right click brings up. You can use this to delete the frame if you no longer want it there, to edit a title, and do several other things. You can right click on anything in your timeline, including audio tracks (although, we’ll get deeper into audio tracks in a later section of this guide). When you are editing your movie, the right click is your friend. When in doubt, right click and you should discover something that will solve your problem.

Ok, now on to adding some fun transitions. For this, you need to go back to the task bar. Find the transitions option and click it.

You will now be presented with a list that looks like this:

Each of these boxes represents the different kinds of transitions you can add. Go ahead and click through them. After you choose one, you can click on the play button in the preview box to see what it looks like in action.

After you’ve chosen one, all you have to do now is drag it between two of your clips. I just did this with one of them:

Look at this carefully. The transition itself now appears on the line below the video section. The two frames I transitions, in this instance the title and first photo, are now overlapped a bit. This will happen every time you add a transition, as what you are doing is moving from one thing to the next without completely finishing with the first clip.

About fading: There is a Fade transition on this list. If you choose that, you will be moving from one to another without a real break. If you use the right click method and add a fade out to the first clip, then a fade in on the second clip, you will get a split second of darkness in between them.

Coming up in Part Six: Editing the Length of Your Video Clips

Friday, December 19, 2008

Dear Officer Wives:

After some recent events, I am downright shocked to discover some of you are under the impression that those of us married to lowly enlisted men are intimidated by you. I would like to assure you that this is definitely not the case. Most of us have absolutely no clue who you are, nor do we care. The last time we checked, not a single one of you had earned your husband's position on the boat, so why would it matter to us what you thought of us? If you happened to show up on our doorstep to give us a baby gift or welcome packet, we would take it with a smile, say good-bye, and promptly forget what your name was. Since we can't remember your name, nor are we up on who everyone is on the crew, we will never discover whether you are married to a JO or the the department head of Sonar. If we run into you later, we'll probably have a hard time remembering where we'd met you before. If you come to a function and no one talks to you except other officer wives, it's not because you are the wife of so-and-so. It's because you aren't friendly and only talk to other officer wives. In the end, the only things we care about are the same things we evaluate any of our other friends by: Are you genuine? Are you honest? Do you mean what you say? Do you have bad breath? Now, if you start wearing your husband's uniform whenever we see you, we will probably get the hint. Be warned, however, that we will quickly close ranks and gossip about what a dope you are the minute you walk out of the room. You can chalk it up to our enlisted status. Which, by the way, means a whole lot of nothing because, just like you, we aren't in the military, either. Strip away the men and we are a bunch of women like any other. So, please, do yourself a favor and stop isolating yourself with the false notion that we are intimidated by...what, exactly? That your husband makes more money? That our husband's have to salute yours? Guess what, last time I checked, I wasn't required to salute anyone, including you. Get over yourself, and I suspect you'll find you have a whole lot more friends. Signed, A disgusted wife of an enlisted sailor

Monday, December 15, 2008

Converting Those Pesky Digital Camera Movies

While I don't really rely on it too much because the video is a bit weak compared to our digital camcorder (which is four years old, no less), I do appreciate that my camera can record short movies. There are times when you just don't have your camcorder on hand (or charged, not that I would know anything about that) and a picture just isn't good enough. However, there's a problem. When you upload these videos to your computer and try to dump them into video editing software, such as MovieMaker, you discover they aren't compatible. Nearly every digital camera out there uses Quicktime format when creating video. It does save space on your card, but until you convert it, there isn't much you can do with it. I decided it was time I solved this problem, so I spent some time tonight searching for a solution. And, I found one. Free, nonetheless! The program is called the RAD Video Tools. You can find it here. I've already used it to convert several of my backlogged videos, and it's a fairly simple tool. Go here for some basic instruction on how to use the program to convert your files. I have heard there are other free tools to convert your video, so if you aren't happy with this, by all means keep looking. There is also plenty of software you can buy if you want something a little nicer. I really don't care about bells and whistles, however. That's why I have the Adobe video editing software. I just needed a program to convert my useless MOV files, which this definitely is. *Make sure you have the latest Quicktime player, however. If you don't, your video won't convert properly. I learned this the hard way!

Monday, December 8, 2008

MovieMaker Tutorial Part Four: Adding Titles

4. Adding Titles

Any good movie needs a few words to help the story along. At the very least, it needs some opening and closing credits. Let’s see how that is done.

Open your project, pull up your collections file, and let’s get to work!

In order to add a title, we need to return to the Tasks menu. Click that, and then look for this:

Selecting this will get you to this screen:

Now, you need to decide where you are putting this title. I’m going to start by adding one at the beginning of my movie. So, I’ll click this option:

That will take me to this screen:

In the screenshot above, I’ve already added the working I want for the beginning title. Do this for your own movie now. You will see it start to play in the box to the right. The default color is a blue background. If you like this look, stop now and click “Done, add title to movie”, and it will return you to the main screen, where your title is now at the beginning of your video track.

However, if this color and font aren’t agreeable, or you’d like to see what other animations you can use, check out the last two options. I’d recommend doing this now, anyway, so you can get an idea of what kind of things you can do with titles.

When you are done with your title, your movie should look something like this:

I’ve zoomed in on it a little so you can clearly see my beginning title. You can zoom in and out on your timeline, too, by clicking the little magnifying glasses with the + and – signs on them. They are hiding underneath my arrow in this screenshot!

You can keep following this same method to add other titles to your movie. The main thing to remember when adding titles to other parts of your movie is actually select the clip you want to add it to.

For instance, if I wanted to add a title right before the dancing guy with fire picture, I would do this. First, I’d click the picture with my mouse:

See how the blue line has moved? That is how you know what part of the movie you are working on at any given time.

Now, I’ll go back and click on the title option again. This time, though, I’m going to choose a different option:

When I create my title, it will be placed right before the selected picture, like so:

One last fun thing I want to show you is how to add words right on top of your pictures or video.

Select the segment you want to have this effect. Click on the title option, and now choose this:

After typing your text, choose the change title animation option. For this, I want my text to overlay on the bottom of the picture. So, I’m looking for this option:

As you can see, my title is showing up in the box to the right. This sky picture is always what you’ll see when doing something like this. It won’t use your own video as background, so don’t worry! When you return to your movie after clicking “done”, the title will be properly applied to your work.

Here is what mine looks like now:

Notice the little box at the bottom of my timeline? That is your title. Remember, if you add something new before the picture associated with this title, the title won’t move with it. You’ll have to remember to click and drag it forward to match it up with your picture again. Yes, it’s annoying, but that’s the way Microsoft is sometimes!

The last thing to do here is make some credits. To do that, you follow the same procedure; you just pick the credits option. When you do so, you will be faced with a slightly looking place to input your text:

Don’t be intimidated by this. You don’t have to fill out every box, just the ones you want to. Here, I’ve filled out mine:

The animations are automatically playing in the box to the right, so I can see if the default credits are to my liking. If not, I can jump into the options and try some new ones. If you decide to do this, scroll all the way down to find the credits options. Also, if you choose something that doesn’t work with what you typed, it may erase some of it when you choose that animation. This isn’t anything major. Just pick something else and retype your text.

It does take some time to get it the way you want it, but just relax and have some fun with it!

Being happy with my own credits, I have now added them to my movie:

Coming up: Part Five, Adding Transitions

Friday, November 28, 2008

MovieMaker Tutorial, part 3

Beginning to Create Your Movie
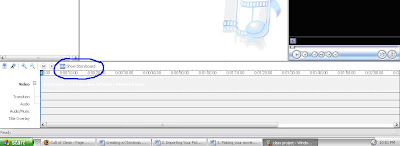
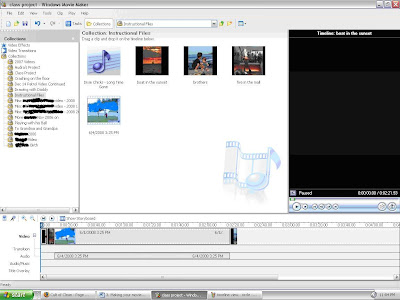
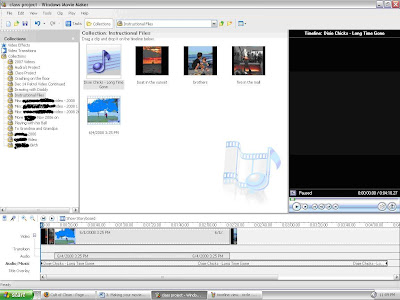
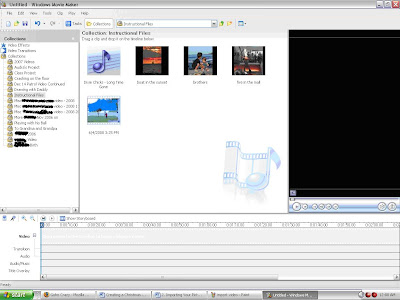
Now, it’s time to begin making the actual movie! First, you need to make your project file (I told you we’d be coming back to this). Click on the small white symbol underneath the word “File” at the top of the page: Now, before you do anything else, click the save button (the little floppy disk symbol), and give your project a name. Now, as you are creating, all you have to do is click that same button and it will save your project automatically. This is a very important thing to remember to do; creating a video involves a lot of steps, and a lot of work you don’t want to have to go back and redo, so never, ever forget to save often!! Now, we are going to take a look at the bottom of your screen. This is where you will be spending all your time, now. First, we are going to lay out your pictures and video the way you want them to appear in the movie. Remember that nothing you do right now is permanent until you convert your project into an actual movie. So, if you decide later you don’t want a particular picture in there, or want to move something around, you can. Let’s take a look at that timeline, now: This is the Timeline view. If you click the little movie symbol circled above, you will see the Storyboard view: Using the Storyboard view makes it easier to see exactly what you have laid out, and you can often add transitions and titles much easier. However, it doesn’t allow you to edit music nor do a lot of the fine tuning you will want to do later. The rest of this guide will use the Timeline view for everything, but remember you can switch to storyboard if you are having trouble finding where one video segment or picture ends and another starts. Ok, let’s start moving your movie elements! You can just click and drag your media to the top row of the Timeline. Here is what it looks like after I did that: Do you see how there is an audio track underneath the video clip I added? By separating the audio and video tracks, MovieMaker allows you to adjust the sound, or even mute it. Remember that, but don’t worry about it too much right now. Ok, now add your music file. Drag it to the row below the audio track of the movie. It will look something like this: If you click play in the black box to the right of the screen, you can preview what you have so far. Obviously, this isn’t the way you want it to look in the end, so now we need to move on to further editing. One very important thing to note: When you are editing your movie, always work from the beginning to the end. The reason for this is because of the way MovieMaker lays out the movie. Each track is considered completely separate until you do the final save and make it an uneditable movie. For example, if you add a new picture or title, it will move everything in the Video track to the right, but all of the audio parts will stay the same. The problem with this is if you’ve lined up a certain part of your music with video or pictures near the end of the movie, changing something in the front of it will mess this up. You’ll have to pick your way through it to make it all line up again. This is my number one frustration with the program. Coming up Next: Adding Titles

Thursday, November 27, 2008

MovieMaker Tutorial, part 2

Importing Your Pictures, Videos, and Music Files

In order to begin this, you first need to be sure the correct collection file is open. If it isn’t, you’ll end up saving your files to a different collections folder. It took me a bit to learn this little trick, so I was often reimporting files when I couldn't’t find them after returning to a saved project. Very frustrating!

In order to bring your folder back up, click the Collections button you used previously. Look for your saved folder, and double click that. Then, move on to the next step.

Click the Tasks button (note, in the first picture I had NOT opened my collections folder before doing this. The next screenshot shows the correct collection listed in the drop down list. This is how yours should look as you move on to working with the Tasks panel):

Your screen should now look something like this:

Let’s start by importing a few pictures. Click “import pictures”.

A box like this will come up:

Page through your files until you find the image you are looking for. Click on it, then click the Import button. Or, you can just double click it, which is what I always end up doing!

Choose as many pictures as you are going to use. If you don't want to click on them one by one, you can CTRL click, click on non-contiguous pictures, and add several at a time. Or, you can Shift click and add a whole row or two of pictures.

As you add them to the collection, they will appear on the white field in the middle of your screen. Here is what my screen looked like after I did this:

A note about collections files: You don’t have to save them as you import. All you are doing is creating a link between your file and the program. If you move your picture somewhere else on your computer at a later date, the collection link will be broken and you will see something like this:

This is a collection file I created several years ago. I’ve since moved the video files, so the link is broken. When you make project files later on, this is also true. Your saved project will have these X boxes instead of clips in your movie if you haven’t saved it as a movie yet. However, the movie I created works fine, because once you save it as a movie, it no longer relies on these links (something we will go over later).

Setting it up this way saves you some memory space. Otherwise, you’d have two copies of everything you were using in Moviemaker. Video files are memory hogs, so this is obviously not an ideal situation.

Ok, moving on! Importing your other files follows pretty much the same steps. I’m going to go through them anyway, to give you a handy reference to follow.

Click on “import audio or music”.

Choose your music, and now you’ll see it added to your pictures. Here’s my view:

Now for the fun part; let’s bring in the video! You know the drill: Click on the “import video” link.

Pick your video and order Moviemaker to begin the import process. Unfortunately, this can take a few minutes. I don’t really understand why as it isn’t actually copying your video, but whatever. Mine always seems to take forever.

So, take a break, make some hot chocolate, tell your son to stop sitting on his brother (oh, wait, that last one was for me), and then come back to a screen that hopefully looks something like this:

Choose any more video clips you want on the final product, and follow the same steps.

Next up is Part Three: Beginning Your Movie!

Tuesday, November 25, 2008

MovieMaker Tutorial, part 1

1. Creating a Collections File

  • This set of instructions assumes a couple of things. First, that you know how to find the program and access it. It also assumes you know how to put video onto your own computer. Since every camera is a little bit different, I decided not to tackle that one. If you have questions, however, please post them in the comments section or send me an email and I'll help you as best I can with it. Now that we have that out of the way, let’s get started!

After opening the program, you will be presented with something that looks like this:

Your very first task is to compile the video clips, digital photos, and/or music you want to use for your video in one place so you can easily access them while you work on the actual video.

Do you see the “Collections” button at the top of the screen? Click it.

Here is where you are going to begin putting together the media you will use to make the video. Click the new folder icon to the right of the drop down menu:

Look for the folder on the list to the left of your screen. As you most likely haven’t used the program before, this will probably be the only folder there, but here is an example:

Type in a name, and hit enter. The most important thing to remember here is that you are going to be making two files in this process. The first is your collections file, where all the pieces of your final video will be saved. The second file, which will be detailed later, is the project file, where your edited movie is saved. When you take a break and then return later, you’ll have to open both files to work on your project.

The name that you just typed should now appear here after you hit enter:

Coming up Next is "Part Two: Importing Your Media Files" so stay tuned!

Sunday, November 9, 2008

Can He Fulfill the Hype?

As stated before, I wasn't particularly thrilled to see Obama elected president. I do think it's rather cool our nation finally elected a black president, I just wish he hadn't turned out to be such a liberal-leaning one. It happened, however, so now I'm waiting to see how it's going to play out. Setting all that aside, however, I don't envy him the biggest task he's going to face: fulfilling all these heightened expectations. He really was a master when it came to utilizing music and slogans to energize people. Even I got a bit excited watching this video: I wonder, though, what people mean when they talk about all the "change" that's coming. Do they know what it is they really want, other than not George Bush? Or do they really not care as long as Obama is different? Which I'm sure he will be. I just wonder if the change he brings will bring more excitement or a lot of cursing. I'm hoping it will be more of the former than the latter, especially for the military, but I think he's got an incredibly difficult job ahead. If he doesn't pull a rabbit out of his hat right off the bat, people are going to start feeling let down. That is probably the most interesting thing to me right now. How is this really going to play out? Are these people singing his praises in the streets today going to keep backing him the first time he does something they don't like? What is his lasting power? I do hope he succeeds, but, wow, he's got a tough road ahead.

Friday, November 7, 2008

Oy Vey, the Navy and Its Uniforms...

This whole uniform change is really starting to irritate me. It didn't help that Oliver had a rank change recently. While that is, of course, good news, it's added a new dimension to the entire problem. Not only are we debating which uniforms must be replaced and which can last a little longer, but we are also trying to decide which are worth buying and sewing on new insignia. The replacement for the old working blues and whites is out, and we've even seen people wearing them around base, so I never bothered to buy a patch for his working blues. He really has had no reason to wear them, and, as far as he knew, wouldn't need them anytime soon. Then he came home last night carrying a bag of new uniform pieces and rank insignia, telling me that the khaki shirt won't be at the NEX until the 15th. I told him I'd go online and see if I could just order it for him. Problem solved, or so I thought. This afternoon, as he was getting ready to leave, he told me he had been told to wear his working uniform instead of the utilities the day before. There's just one problem with this....there's still no patch on his blues! So, he pulled on his new jacket (which actually goes with the new uniform, not the working blues) and just said he'd wear it all evening so no one would know the difference. Amusingly enough, he was nearly right. He did have to take his jacket off after all. It poured today (ah, thank you, Washington), so he got pretty wet. He walked around with a second class patch on all afternoon and evening, as well as a missing ribbon because we couldn't find the one I'd bought him months ago, and only one person took note of it. This is the subforce we are talking about, however. Remember, they are all men!

Thursday, November 6, 2008

Cloth Diapering in Hawaii

This post is going to end up being two in one: a new Hawaii post, and an entry in the Thrifty Green Thursday carnival over at Green Baby Guide. It just seemed like a perfect match!
I am really proud of myself for cloth diapering on vacation. I wasn't all that sure I could make it work, but I did. We didn't actually do it 100%, but it was close to 70%. We were in Hawaii for ten days total. If using only disposables in that time, we would have gone through a little over a pack of diapers. We packed a partial pack; I'm thinking it was about 3/4 full. We came home with about a dozen diapers. So, how did we make it work? I bought a dozen flats. We already had some JamTots covers, and I packed a couple of those. They weren't the best option because they are made of Minkee, which doesn't dry particularly fast, but they worked well enough. I didn't really want to buy new covers, although I might go with something like a Bummis or a Prowraps cover next time. Both of those have the shiny side of the PUL facing the inside, so they are easy to wipe clean between uses. I also brought a few of our BumGenius 3.0s. These are the only diapers we rely on for nighttime use. They also don't take very long to dry if you turn them inside out, which was the main reason I brought them. Left behind were the AIOs and both microfiber and hemp inserts. These are not easy to clean in a hotel sink, and they take forever to dry, even in the dryer, so not a good vacation choice. Flats, on the other hand, are fantastic for travel. I almost wish I'd been daring enough to try them out when I first cloth diapered. I could have saved us some money. I paid all of $13.00 for our dozen, with shipping. They are fairly easy to hand wash, and they dry quickly. I didn't take the time to learn any fancy folding methods, either. I just did the following:
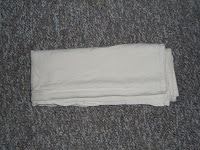
First, I folded them in half:
Then, I folded them in thirds the long way: Finally, I folded that in half:
I took the end result and laid it into a diaper cover (just like what I did here), or stuffed it into one of the pocket diapers. I never had any leakage problems. They also packed pretty well, which is a big problem with cloth diapers. They take up so much room. Bringing along cloth diapers had its other perks, too. While we were on the Big Island, we introduced Oscar to the pool for the very first time. It was kind of a last minute decision to put him in the pool, so we didn't have his swim diaper handy. No problem; cloth diapers work just as well! We were lucky enough to be visiting relatives while we were out there, so we had access to a washer and dryer for part of the time. We only did one load of laundry, though, which surprised me. The rest of the time I just washed them out in the sink and let them drip dry. Oscar tends to poop in the morning, so we used the disposables mostly for nighttime and the morning diaper change. We also did all flights with disposables. I didn't have the patience to deal with cloth in the limited space of an airplane. If you do decide to take the plunge and try this, remember to pack whatever detergent you are used to using on your diapers. I just put some in a tiny Tupperware container (we use dry soap). No matter how well you rinse, you'll probably end up with some detergent build-up, but it shouldn't really be an issue while you are gone. Just give your diapers a really good wash with some extra rinses when you get home, and all should be fine.

Tuesday, November 4, 2008

A Message to Our New President:

Now that you've managed to convince more than half this nation you are up to the job, do me a favor. Don't screw this up. Don't destroy what so many people have given their lives to make in Iraq and Afghanistan. Don't make their sacrifice worth nothing. Don't gut our military like Clinton did. Be smart and aware, and stop pushing yourself as the savior of the world. Focus on what's important. And, most of all, don't mess with my family. Don't make it harder than it already is. You didn't earn my vote the first time around, so here's your big chance. You have four years to convince me you can do this job well. Don't mess it up.

What's a Vote Worth?

* Well, I'm disappointed I can't find the link to the article I read in our newspaper this morning. I thought I'd be able to find it on their website, but no dice. Sorry for the lack of supporting evidence! I voted last night. I'm not sure why it took me so long, but I finally filled out the ballot and sent it on its way. It felt pretty good. However, when I picked up the paper this morning, I found an article detailing the odds our votes will actually make any difference. Depending on where you live, your vote has worse odds of changing the outcome than you have of dying by a dog bite this year. Well, that's enlightening! Luckily, I'm under no illusion my vote in the presidential election will mean much. I'm cursed to live in a state that tends to vote a different path when it comes to things like that. I'm actually a whole lot more interested in what happens in our governor's race. Four years ago, the Democrats managed to buy the election somehow. After Dino Rossi, the Republican candidate, won twice, they paid for a second recount and somehow won. I know they argue that they didn't fix it in any way, but, please, doesn't that somehow seem a little weird to anyone else? My vote in this case has a much greater chance of making a difference than a dog bite killing me, so it's all rather exciting to vote for the governor. Not much time left to find out what happens! I'm proud to say I've never missed voting in any presidential election since I turned eighteen. This is by far the most interesting and fatiguing race I've yet witnessed. Thank heavens it's nearly over. One of two things will happen on the Big Day: my picks will win and I'll be cheering, or my picks will lose and I will get the great pleasure of saying "I told you so" when the other guys screw things up. Either way, I'm in for some fun. Now, get out there and vote!!

Monday, November 3, 2008

Weird Oddities of Some Navy Wives

There are definitely a lot of weird things about military life. The one that mystifies me most, however, comes from those that marry into it. I have heard so many times that so-and-so doesn't want to get to know any of the other wives on their husband's boat. Sometimes, they go so far as to say they don't want to associate with any Navy wives, period. I really don't get this. Saying that makes as much sense as saying, "See all those people with curly hair? I don't want to meet any of them because they have curly hair just like me." Yep, that's right. You know all those Navy wives that you want nothing to do with? You are one of them! Seriously, why does this not occur to people who say that? What makes them think they are different from everyone else who married someone in the Navy? And why not make bonds with the people that are going through all this chaos with you? Becoming friends with someone whose husband serves with yours doesn't force you to become the next FRG leader. Trust me, I volunteered for my job; no one forced me to do it. As annoying as I find this, though, they are really only hurting themselves. These are the same people who complain the most about feeling isolated and friendless, who move home during deployments rather than making connections in the place they live (although, as with anything, there are obviously more reasons than not building a life to go back home), and the ones that never know what is going on with the boat because they refuse to go to meetings where that sort of information is given. I just wish I knew what kind of thought process goes into this. Is there some kind of perception that anyone who marries a guy in the Navy is automatically a loser who will gossip about you behind your back? Last time I checked, none of my friends, most of whom are military wives, are like this. They are pretty normal people, not that different from the friends I've made outside our Navy circle. The main difference? I don't have to explain much about what's going on; they already know about duty and what it's like the day the boat leaves, about the uncertainties of every day, and how the Navy is always demanding what you don't want to give. I wouldn't trade these friendships for anything. These are the people who got me through my toughest deployments, and helped me acclimate to this new life five years ago. If you feel so strongly that all Navy wives are beneath you, well, I feel sorry for you. You're missing out.