Tuesday, December 23, 2008

MovieMaker Instructions, Part 5

5. Adding Transitions

All right, load up your files and let’s get going! We are going to be making transitions now. This is how you move from one section of your film to another with a smooth effect. Most professional movies use a basic fade from one scene to another. You can do the same thing with your movie. Or, if you want it to be a little more creative, you can choose from many other transitional effects.

Let’s take a look at some of them. First, we’re going to add a very simple fade in/fade out effect. Look at your timeline. Move to your first frame (or wherever you want this effect) and right click it. You should see something like this:

Look at the box you just opened. The options you are looking for are at the very bottom. Click the “Fade In” text with your mouse. Now, right click it again. You should see something like this:

Notice how there is a check mark in front of the “Fade In” option? If you click play in the black preview box, you can see how it has added a fade in effect to your opening title.

Follow the same steps to add a fade out to the same title.

Take a little time to get to know this box your right click brings up. You can use this to delete the frame if you no longer want it there, to edit a title, and do several other things. You can right click on anything in your timeline, including audio tracks (although, we’ll get deeper into audio tracks in a later section of this guide). When you are editing your movie, the right click is your friend. When in doubt, right click and you should discover something that will solve your problem.

Ok, now on to adding some fun transitions. For this, you need to go back to the task bar. Find the transitions option and click it.
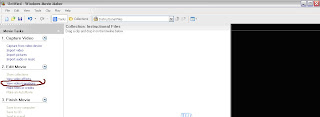
You will now be presented with a list that looks like this:

Each of these boxes represents the different kinds of transitions you can add. Go ahead and click through them. After you choose one, you can click on the play button in the preview box to see what it looks like in action.

After you’ve chosen one, all you have to do now is drag it between two of your clips. I just did this with one of them:

Look at this carefully. The transition itself now appears on the line below the video section. The two frames I transitions, in this instance the title and first photo, are now overlapped a bit. This will happen every time you add a transition, as what you are doing is moving from one thing to the next without completely finishing with the first clip.

About fading: There is a Fade transition on this list. If you choose that, you will be moving from one to another without a real break. If you use the right click method and add a fade out to the first clip, then a fade in on the second clip, you will get a split second of darkness in between them.

Coming up in Part Six: Editing the Length of Your Video Clips

Friday, December 19, 2008

Dear Officer Wives:

After some recent events, I am downright shocked to discover some of you are under the impression that those of us married to lowly enlisted men are intimidated by you. I would like to assure you that this is definitely not the case. Most of us have absolutely no clue who you are, nor do we care. The last time we checked, not a single one of you had earned your husband's position on the boat, so why would it matter to us what you thought of us? If you happened to show up on our doorstep to give us a baby gift or welcome packet, we would take it with a smile, say good-bye, and promptly forget what your name was. Since we can't remember your name, nor are we up on who everyone is on the crew, we will never discover whether you are married to a JO or the the department head of Sonar. If we run into you later, we'll probably have a hard time remembering where we'd met you before. If you come to a function and no one talks to you except other officer wives, it's not because you are the wife of so-and-so. It's because you aren't friendly and only talk to other officer wives. In the end, the only things we care about are the same things we evaluate any of our other friends by: Are you genuine? Are you honest? Do you mean what you say? Do you have bad breath? Now, if you start wearing your husband's uniform whenever we see you, we will probably get the hint. Be warned, however, that we will quickly close ranks and gossip about what a dope you are the minute you walk out of the room. You can chalk it up to our enlisted status. Which, by the way, means a whole lot of nothing because, just like you, we aren't in the military, either. Strip away the men and we are a bunch of women like any other. So, please, do yourself a favor and stop isolating yourself with the false notion that we are intimidated by...what, exactly? That your husband makes more money? That our husband's have to salute yours? Guess what, last time I checked, I wasn't required to salute anyone, including you. Get over yourself, and I suspect you'll find you have a whole lot more friends. Signed, A disgusted wife of an enlisted sailor

Monday, December 15, 2008

Converting Those Pesky Digital Camera Movies

While I don't really rely on it too much because the video is a bit weak compared to our digital camcorder (which is four years old, no less), I do appreciate that my camera can record short movies. There are times when you just don't have your camcorder on hand (or charged, not that I would know anything about that) and a picture just isn't good enough. However, there's a problem. When you upload these videos to your computer and try to dump them into video editing software, such as MovieMaker, you discover they aren't compatible. Nearly every digital camera out there uses Quicktime format when creating video. It does save space on your card, but until you convert it, there isn't much you can do with it. I decided it was time I solved this problem, so I spent some time tonight searching for a solution. And, I found one. Free, nonetheless! The program is called the RAD Video Tools. You can find it here. I've already used it to convert several of my backlogged videos, and it's a fairly simple tool. Go here for some basic instruction on how to use the program to convert your files. I have heard there are other free tools to convert your video, so if you aren't happy with this, by all means keep looking. There is also plenty of software you can buy if you want something a little nicer. I really don't care about bells and whistles, however. That's why I have the Adobe video editing software. I just needed a program to convert my useless MOV files, which this definitely is. *Make sure you have the latest Quicktime player, however. If you don't, your video won't convert properly. I learned this the hard way!

Monday, December 8, 2008

MovieMaker Tutorial Part Four: Adding Titles

4. Adding Titles

Any good movie needs a few words to help the story along. At the very least, it needs some opening and closing credits. Let’s see how that is done.

Open your project, pull up your collections file, and let’s get to work!

In order to add a title, we need to return to the Tasks menu. Click that, and then look for this:

Selecting this will get you to this screen:

Now, you need to decide where you are putting this title. I’m going to start by adding one at the beginning of my movie. So, I’ll click this option:

That will take me to this screen:

In the screenshot above, I’ve already added the working I want for the beginning title. Do this for your own movie now. You will see it start to play in the box to the right. The default color is a blue background. If you like this look, stop now and click “Done, add title to movie”, and it will return you to the main screen, where your title is now at the beginning of your video track.

However, if this color and font aren’t agreeable, or you’d like to see what other animations you can use, check out the last two options. I’d recommend doing this now, anyway, so you can get an idea of what kind of things you can do with titles.

When you are done with your title, your movie should look something like this:

I’ve zoomed in on it a little so you can clearly see my beginning title. You can zoom in and out on your timeline, too, by clicking the little magnifying glasses with the + and – signs on them. They are hiding underneath my arrow in this screenshot!

You can keep following this same method to add other titles to your movie. The main thing to remember when adding titles to other parts of your movie is actually select the clip you want to add it to.

For instance, if I wanted to add a title right before the dancing guy with fire picture, I would do this. First, I’d click the picture with my mouse:

See how the blue line has moved? That is how you know what part of the movie you are working on at any given time.

Now, I’ll go back and click on the title option again. This time, though, I’m going to choose a different option:

When I create my title, it will be placed right before the selected picture, like so:

One last fun thing I want to show you is how to add words right on top of your pictures or video.

Select the segment you want to have this effect. Click on the title option, and now choose this:

After typing your text, choose the change title animation option. For this, I want my text to overlay on the bottom of the picture. So, I’m looking for this option:

As you can see, my title is showing up in the box to the right. This sky picture is always what you’ll see when doing something like this. It won’t use your own video as background, so don’t worry! When you return to your movie after clicking “done”, the title will be properly applied to your work.

Here is what mine looks like now:

Notice the little box at the bottom of my timeline? That is your title. Remember, if you add something new before the picture associated with this title, the title won’t move with it. You’ll have to remember to click and drag it forward to match it up with your picture again. Yes, it’s annoying, but that’s the way Microsoft is sometimes!

The last thing to do here is make some credits. To do that, you follow the same procedure; you just pick the credits option. When you do so, you will be faced with a slightly looking place to input your text:

Don’t be intimidated by this. You don’t have to fill out every box, just the ones you want to. Here, I’ve filled out mine:

The animations are automatically playing in the box to the right, so I can see if the default credits are to my liking. If not, I can jump into the options and try some new ones. If you decide to do this, scroll all the way down to find the credits options. Also, if you choose something that doesn’t work with what you typed, it may erase some of it when you choose that animation. This isn’t anything major. Just pick something else and retype your text.

It does take some time to get it the way you want it, but just relax and have some fun with it!

Being happy with my own credits, I have now added them to my movie:

Coming up: Part Five, Adding Transitions